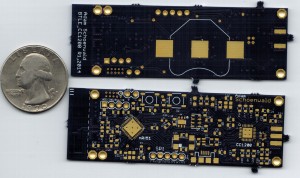
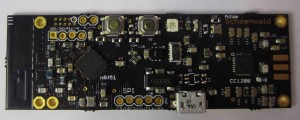
While somewhat intimidating at first, it turns out reflow is actually really easy compared to hand soldering each part. First you apply solder paste to the pcb, I used a stencil for this that I got from www.oshstencils.com . I held down the stencil with some tape and spread out the paste. I ended up with a little bit too much paste, so I plan to shrink the paste pads on my next order. Here are the untouched PCBS from OSHPark. This is the first PCB I’ve made and I think it came out really well, although there are definitely some things I’ll do differently on my next.
The tedious part here is placing components. The paste is tacky, so the parts stay put once you get them down. Unfortunately after applying the paste you only have so much time before the solder paste starts to harden (I gave myself about an hour, but this could make an interesting test). To speed up the component placement, I taped my parts to cardboard in the order I wanted to place them.
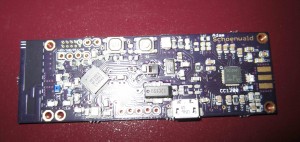
I put the assembled PCB into a skillet as decribed by the sparkfun reflow tutorial (https://www.sparkfun.com/tutorials/59#Skillet) . Because of the toxic fumes that come out of the paste during reflow, its not a good idea to do this in anything you use for cooking. I picked up the skillet for only $40, clearance at target. Here is a picture of the parts before the pan got hot, and another as the paste was starting to melt.
After the solder paste texture became a metallic sheen, I turned down the head and waited for it to cool. As I mentioned before, I ended up with too much paste on a lot of the pads resulting in solder balls coming out of the corners of the IC’s. I think this is probably due the paste on the ground planes under the chips. I also found that a few of the placements were off by more than %50 (if the pads are at more more aligned than not the surface tension created by the melted solder should pull the parts into place). I really want to capture a video of the parts as they start to wiggle into place, its quite the site to see. Another issue you can run into when doing reflow is tombstoning, where one pad heats up and the paste melts before the other. If the surface tension on the melted pad is high enough, it will pull the part strait up. To prevent this, I used the ‘thermals’ setting on my ground plane in eagle. This helps isolate the thermal conductivity of a pad to its surrounding ground plane, ideally causing all of the pads themselves to heat up at the same rate.
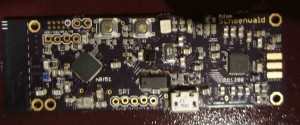
Finally I touched up the PCB. First I added the missing components that drifted off. Then I had to deal with the solder balls. First I wicked some of the solder away with braid, then I applied a thin line of flux paste from a syringe to the edges of the of the IC’s and ran a hot iron around the edges. The paste flux is some pretty powerful stuff, and the solder quickly aligned itself between the pins and the pads only. Here is a picture of the final assembled PCB. It still needs some RC debouncing parts which I intend to choose after testing out the switches, as well as crystal tuning capacitors for the cc1200 crystal. I calculated the capacitance of the crystal traces to help compensate for the total capacitance seen by the IC and crystal, but I would like to measure this to confirm. Now I get to start working on the code, I’ll probably start off by turning the LED’s on and off, then turn them on and off over wireless, and then drivers/packet construction for the weather sensors.
I have access to a binocular microscope at the office, but I would really like to be able to take pictures through it. The pictures so far have turned out fairly lousy, I think I’ll need to invest in a tri-pod for stabilization, a remote / wired trigger (maybe I could make one of these) so nothing moves when I take the picture, and a ring light for more even lighting. I took a bunch of videos and pictures using a cannon point and shoot that came out pretty badly, but the finished PCB picture came from an Olympus E510 with a macro lens. The Olympus can’t do video, so I still need a new solution if I want to get a high def video of the reflow.
